Most home vocal recordings fail not because of budget gear, but because singers ignore the fundamentals that separate bedroom demos from professional tracks.
Recording vocals at home requires understanding how your room, microphone choice, and signal chain work together as a complete system. After years of obsessively buying, using and comparing audio gear, or harsh simply because they skipped essential setup steps that cost nothing but make everything sound better.
This workflow covers room preparation, microphone selection and placement, signal chain optimisation, and recording techniques that deliver consistent results. Each step builds on the previous one, creating a foundation that lets you focus on performance rather than fighting technical problems during tracking.
Setting Up Your Recording Space
Room acoustics matter more than microphone choice for vocal recording quality. Hard surfaces like walls, windows, and desks create reflections that arrive at your microphone milliseconds after the direct sound, causing that hollow, distant character that marks amateur recordings. Walk into your potential recording spaces and clap your hands sharply. Rooms with obvious echoes or flutter need treatment before you place a single microphone.
The quickest solution involves creating a temporarily dead space using what you already own. Heavy blankets, duvets, and clothing absorb mid and high frequencies effectively when arranged around your recording position. I often hang thick blankets on stands behind and to the sides of the singer, creating a makeshift vocal booth that eliminates most problematic reflections without permanent room modifications.
For permanent improvements, acoustic treatment panels like Primacoustic Broadway panels or Auralex Studiofoam work better than household items, but placement matters more than brand. Focus treatment on the wall behind the microphone and the corners behind the singer. These locations catch the strongest early reflections that interfere with vocal clarity and definition.
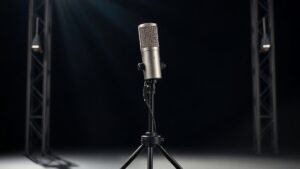
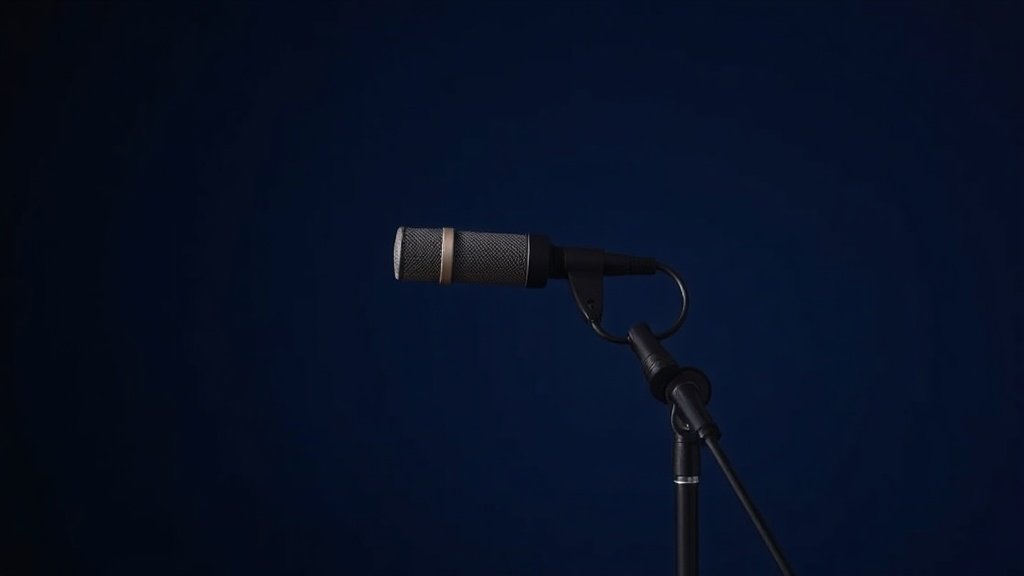
Choosing and Positioning Your Microphone
Large diaphragm condenser microphones remain the standard for home vocal recording because they capture detail and presence that dynamic microphones often miss. The Audio-Technica AT2020, Rode NT1, and AKG C214 represent reliable choices that perform well in treated home environments. Each offers the sensitivity needed for intimate vocal performances while maintaining enough rejection of room sound to work in less-than-perfect spaces.
Polar pattern selection determines how much room sound your microphone captures along with the vocal. Cardioid patterns work best for home recording because they reject sound from behind the microphone, reducing room reflections and background noise. Position the microphone so the null point at the rear faces your noisiest wall or window, typically the one facing the street or containing heating and cooling vents.
Distance and height placement require more attention than most home recordists give them. Position the microphone six to twelve inches from the singer, with the capsule at mouth height or slightly above. Closer placement increases presence but also captures more mouth sounds and breathing. Further distances sound more natural but pick up more room reflections. Test both extremes with your specific room and microphone combination to find the sweet spot where vocal detail balances with natural sound.
The microphone only captures what your room and placement decisions allow it to hear clearly.
Optimising Your Signal Chain
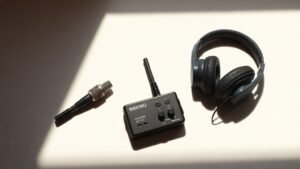
Your audio interface provides the crucial link between microphone and computer, and its preamp quality directly affects vocal tone and noise floor. Interfaces like the Focusrite Scarlett Solo, PreSonus AudioBox USB 96, or Zoom PodTrak P4 offer clean preamps with enough gain for condenser microphones without adding noise or distortion that becomes obvious during mixing and mastering.
Gain staging requires attention at the recording stage because digital clipping cannot be repaired later. Set your interface gain so vocal peaks hit around negative twelve to negative six decibels on your recording software meters. This level provides enough signal strength for clean recordings while leaving headroom for unexpected loud passages or processing during mixing. Most interfaces include peak indicators that flash red when clipping occurs, giving you immediate feedback during sound check.
Monitor your recordings through closed-back headphones rather than speakers during tracking to prevent feedback and give you accurate representation of what the microphone actually captures. The Sony MDR-7506, Audio-Technica ATH-M40x, or Beyerdynamic DT770 Pro provide the isolation and accuracy needed for tracking work. Open-back headphones sound more natural but leak enough sound to create feedback loops or bleed into sensitive condenser microphones.
Recording Techniques That Matter
Consistent microphone distance requires more discipline than most singers maintain naturally. Mark the floor with tape to show proper standing position, and use a pop filter positioned halfway between mouth and microphone to provide a visual reference for distance control. The Aokeo Professional or Stedman Corporation Proscreen XL pop filters eliminate plosive sounds from P and B consonants while helping singers maintain consistent positioning throughout takes.
Multiple takes with different approaches give you options during editing that single perfect take attempts rarely provide. Record a complete performance focusing on emotion and phrasing, then do additional passes emphasising technical accuracy and pitch precision. Composite editing lets you combine the best elements from multiple performances into a final track that captures both feeling and technical excellence.
Room tone recording often gets skipped but provides essential material for seamless editing. After completing vocal takes, record thirty seconds of silence in the same position with identical microphone and preamp settings. This captures the ambient sound of your recording space, which you can use to fill gaps between vocal phrases and create smooth transitions during editing without obvious cuts or digital silence that sounds unnatural.
Managing Takes and Building Performances
Punch recording allows you to fix specific phrases or words without re-recording entire sections, but it requires careful setup to sound seamless. Enable pre-roll in your recording software so you hear several seconds of existing audio before the punch point, giving you time to match the phrasing, tone, and energy of the original performance. Most DAW software like Pro Tools, Logic Pro, or Reaper includes automatic crossfading that smooths transitions between old and new material.
Vocal comping combines the best phrases from multiple complete takes into a single master performance. This technique works better than punch recording for complex songs because it maintains natural phrasing flow while allowing you to choose the best version of each musical phrase. Take notes during recording sessions about which takes contain the best versions of specific sections, making the comping process faster and more focused later.
Reference monitoring during tracking helps you make better performance decisions in real time. Set up a rough monitor mix with instrumental backing tracks at appropriate levels so you can judge vocal balance, pitch accuracy, and emotional delivery as you record. Vocals should sit slightly above the instrumental level in your headphone mix, loud enough for accurate pitch judgment but not so dominant that you lose connection with the musical context.
Recording too close to the microphone creates an overly intimate sound with excessive low frequency buildup. This proximity effect makes vocals sound boomy and unnatural, requiring heavy EQ correction later that often introduces other problems. Position yourself six to twelve inches from the capsule for balanced frequency response.
Ignoring room reflections because you own an expensive microphone leads to hollow, distant recordings. Even professional microphones cannot distinguish between direct vocal sound and reflections from untreated walls. Add acoustic treatment or temporary absorption around your recording position before upgrading your microphone.
Setting recording levels too high to achieve maximum digital resolution results in clipped peaks that cannot be repaired. Digital distortion sounds harsh and obvious, unlike analog saturation that can sound musical. Record with peaks between negative twelve and negative six decibels, leaving headroom for unexpected loud passages and post-processing headroom.
Conclusion
Professional home vocal recording depends on systematic attention to room acoustics, microphone placement, and signal chain optimisation rather than expensive gear purchases. Focus on controlling your recording environment first, then develop consistent techniques for microphone positioning and gain staging. These fundamentals provide the foundation that lets your performances shine through clean, professional recordings that compete with commercial releases.

FREE DOWNLOAD
Stop Guessing. Start Buying Smart.
The specs that actually matter, demystified.
Headphones, microphones, the spec sheet jargon you can ignore — all in one quick-reference PDF. Free, instant, no fluff.
Send Me the CheatsheetYou'll also receive occasional new guide notifications. Unsubscribe anytime. No spam, ever.