The difference between a guitar recording that sounds like music and one that sounds like cardboard often comes down to two decisions made in the first thirty seconds.
Recording acoustic guitar properly requires understanding how different microphones capture the complex frequency spectrum of wooden instruments. After fifteen years behind mixing desks and in recording booths, I have learned that microphone choice matters less than microphone placement, but both decisions shape the final result significantly.
This guide covers the essential microphone types for acoustic guitar recording, placement techniques that capture both body resonance and string detail, and the common positioning mistakes that turn great performances into unusable recordings.
Condenser Microphones for Detail and Presence
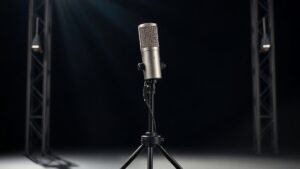
Large diaphragm condenser microphones excel at capturing the full frequency range of acoustic guitars. The Audio-Technica AT2020 provides excellent detail retrieval for its price point, while the Rode NT1-A offers similar performance with slightly more midrange warmth. Both microphones feature cardioid polar patterns that focus on the guitar while rejecting room reflections.
Small diaphragm condensers like the Shure SM81 or Audio-Technica AT4041 capture transient response more accurately than their large diaphragm counterparts. This translates to better pick attack definition and clearer finger noise detail. The trade-off comes in overall presence and low-frequency response, where large diaphragm models typically perform better.
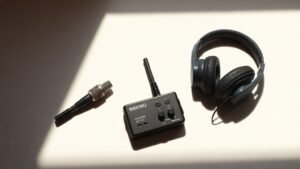
Condenser microphones require phantom power from your audio interface, typically 48 volts. They also pick up more room noise than dynamic microphones, making acoustic treatment or recording location more critical for clean results.
Dynamic Microphones for Warmth and Control
Dynamic microphones offer natural compression and reduced sensitivity to room acoustics. The Shure SM57 remains a studio standard for acoustic guitar recording, providing midrange focus that cuts through dense mixes. The Sennheiser MD421 delivers similar character with extended frequency response and better low-end capture.
These microphones work well in untreated rooms where condenser microphones would capture too much ambient noise. They also handle high sound pressure levels without distortion, useful for aggressive fingerpicking or percussive playing techniques. The natural compression effect can enhance rhythm guitar parts that need to sit steady in the mix rather than jump forward.
Position determines whether you capture the guitar or just expensive room tone with some guitar mixed in.
Single Microphone Placement Techniques
The 12th fret position offers the most balanced capture of string detail and body resonance. Place the microphone 6 to 12 inches away, angled slightly toward the sound hole but not pointing directly into it. This position captures both the percussive attack from the strings and the woody resonance from the guitar body.
Closer placement increases intimacy and reduces room influence, while greater distance incorporates more natural reverb and air around the instrument. Moving the microphone toward the bridge emphasises string brightness and pick attack. Positioning closer to the sound hole increases low-frequency content but risks boomy, uncontrolled bass response.
Experiment with microphone height as well as horizontal position. Placing the microphone slightly above or below the guitar plane changes the balance between direct string sound and reflected sound from the guitar top, affecting both tonal character and stereo image in the final mix.
Two-Microphone Stereo Techniques
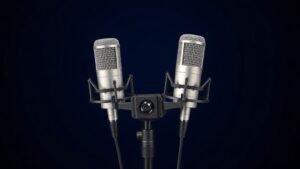
XY stereo placement uses two identical microphones positioned close together with capsules angled 90 to 120 degrees apart. This technique provides good stereo imaging with minimal phase issues. Position the microphone pair 8 to 15 inches from the guitar, aimed between the 12th fret and the bridge. A pair of Audio-Technica AT4041 microphones or Rode M5 matched pairs work well for this approach.
AB stereo spacing places two microphones several feet apart to capture different perspectives of the instrument. One microphone focuses on the neck and upper bout, while the second captures the lower bout and sound hole area. This technique creates wider stereo imaging but requires careful attention to phase relationships during mixing.
The spaced pair approach works particularly well with dynamic microphones like two Shure SM57 units, where the reduced sensitivity helps control phase issues that plague closely spaced condenser arrangements. Time-align the tracks during mixing to ensure solid mono compatibility.
Room Considerations and Acoustic Treatment
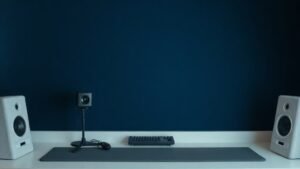
Untreated rooms add reflections that can enhance or destroy acoustic guitar recordings. Hard surfaces create bright reflections that emphasise string noise and pick attack, while soft furnishings absorb high frequencies and can make recordings sound dull. The key lies in controlling first reflections while preserving some natural ambience.
Record in rooms with mixed surfaces rather than completely dead or completely live spaces. A room with carpet, curtains, and some hard surfaces typically provides better results than a bathroom or a closet full of clothes. Position the guitar and microphone away from parallel walls to minimise standing wave issues.
Temporary acoustic treatment using blankets or portable acoustic panels can improve results without permanent room modifications. Focus treatment on the wall behind the microphone rather than behind the guitar, as this controls the most problematic first reflections that interfere with the direct sound.
Pointing the microphone directly at the sound hole creates boomy, uncontrolled low frequencies. The sound hole acts as a port that emphasises specific bass frequencies while creating phase cancellations. Aim toward the area where the neck meets the body instead.
Recording too close eliminates the natural resonance that makes acoustic guitars sound alive. Distances under four inches capture only string noise and miss the complex interactions between strings, wood, and air cavity. Start at eight inches and adjust from there.
Using only one microphone position limits your mixing options later. Even if you plan a mono guitar track, recording a second microphone position gives you blending options that can save a performance with timing or tuning issues.
Conclusion
Successful acoustic guitar recording depends more on microphone placement than microphone selection. Start with the 12th fret position at eight inches distance, then adjust based on the specific guitar, player, and musical context. Take time to listen through headphones during setup rather than relying on visual positioning alone.

FREE DOWNLOAD
Stop Guessing. Start Buying Smart.
The specs that actually matter, demystified.
Headphones, microphones, the spec sheet jargon you can ignore — all in one quick-reference PDF. Free, instant, no fluff.
Send Me the CheatsheetYou'll also receive occasional new guide notifications. Unsubscribe anytime. No spam, ever.