Recording hiss destroys otherwise professional tracks and the culprit lives somewhere in your signal chain waiting to be identified and eliminated.
After years of obsessively buying, using and comparing audio gear, I can tell you that unwanted hiss in recordings has predictable sources. The background noise that sneaks into your tracks comes from specific points in the audio signal path, and each source requires a different approach to fix properly.
This guide covers the primary causes of recording hiss and the systematic approach I use to eliminate background noise. We will examine preamp gain staging, microphone self-noise, environmental factors, and monitoring setup issues that contribute to noisy recordings.
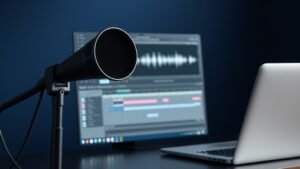
Understanding Your Signal Chain Noise Floor
Every piece of audio equipment adds some level of noise to your signal. The Focusrite Scarlett Solo has a measured noise floor of -100 dBu, while the Universal Audio Apollo Twin pushes that down to -129 dBu. These numbers represent the inherent hiss each device contributes even with no input signal present. Your recording chain combines these individual noise floors into a cumulative background that becomes audible when gain stages are set incorrectly.
The most common mistake involves cranking preamp gain to compensate for weak microphone signals. When I see someone recording a Shure SM57 with the interface gain at maximum, that setup guarantees noisy results. Dynamic microphones like the SM57 produce lower output levels than condensers, but the solution involves proper microphone technique and positioning rather than excessive gain compensation.
Cable quality affects noise floor significantly in longer runs. A cheap XLR cable introduces interference that manifests as hiss, especially in runs longer than 3 metres. Mogami 2534 cables cost more than generic alternatives but eliminate the noise contribution that budget cables add to your signal chain.
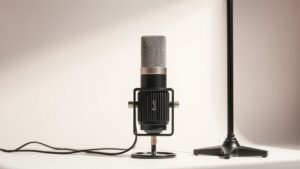
Microphone Self-Noise and Positioning
Condenser microphones generate their own noise through internal electronics. The Audio-Technica AT2020 specs show 16 dB-A self-noise, while the Neumann U87 measures 7 dB-A. Lower numbers mean quieter microphones, but positioning matters more than specifications for most recording situations. A louder microphone placed correctly will always outperform a quiet microphone positioned poorly.
Distance from your microphone determines how much preamp gain you need to achieve proper recording levels. Recording vocals from 30 centimetres away requires significantly less gain than recording from 60 centimetres. That reduced gain requirement directly translates to lower noise in your final recording. I consistently see better results from close-miked sources with moderate gain settings than distant sources with high gain compensation.
Room treatment affects how much microphone gain you can use effectively. Untreated rooms require greater microphone distances to avoid capturing excessive room reflections, which forces higher gain settings and increased noise. Basic acoustic treatment using Primacoustic London panels allows closer microphone placement and cleaner recordings with less background hiss.
Proper gain staging eliminates more recording hiss than expensive low-noise equipment ever will.
Preamp Gain Staging Fundamentals
Digital audio interfaces provide visual feedback for optimal gain staging through input meters. The PreSonus AudioBox USB 96 shows green, yellow, and red LED indicators that correspond to different input levels. Target the yellow range for most sources, which provides adequate headroom while maintaining strong signal-to-noise ratio. Red indicators mean clipping, but staying only in green often results in weak signals that require digital makeup gain and increased noise.
The 18 dB rule applies to most recording situations with dynamic microphones. Set your preamp gain so peak signals hit -18 dBFS on your interface meters. This level provides 18 decibels of headroom before digital clipping while keeping your signal well above the noise floor. Condenser microphones often require less preamp gain due to higher output levels, so the same -18 dBFS target may require lower physical gain settings on your interface.
Different microphones require different approaches to gain staging. The Electro-Voice RE20 needs significantly more preamp gain than the Rode PodMic for the same source, despite both being dynamic broadcast microphones. Learn the gain requirements for your specific microphones rather than relying on generic settings, and document those settings for consistent results across recording sessions.
Environmental and Electrical Noise Sources
Computer fans, air conditioning systems, and fluorescent lighting contribute to the noise floor in your recordings. These sources create constant background hiss that microphones capture along with your intended signal. The solution involves identifying and controlling these environmental factors rather than fighting them with post-processing. Recording during quieter times of day often provides immediate improvement without equipment changes.
Electrical interference from USB devices, wireless transmitters, and switching power supplies creates high-frequency noise that appears as hiss in recordings. Mobile phones placed near audio equipment generate periodic interference patterns that manifest as crackling or buzzing rather than smooth hiss. Create physical separation between audio gear and potential interference sources, and use ferrite cores on USB and power cables when interference persists.
Ground loops between connected equipment create hum and noise that varies with preamp gain settings. This issue commonly occurs when connecting computer audio interfaces to external mixers or when using multiple powered devices in the same signal chain. The Hum X ground loop eliminator resolves most ground loop issues without compromising audio quality or electrical safety.
Monitoring and Detection Techniques
Proper monitoring reveals noise issues that remain hidden through inadequate playback systems. The Beyerdynamic DT 770 Pro headphones expose background noise that remains inaudible through computer speakers or earbuds. What sounds clean through laptop speakers often reveals significant hiss when monitored through proper studio headphones at appropriate levels.
Record room tone before each session to establish your noise floor baseline. This 30-second recording with no input signal shows exactly what background noise your setup contributes to recordings. Compare this baseline between different gain settings and equipment configurations to identify the quietest possible setup for your recording environment.
Use high-pass filtering during recording rather than relying on post-processing alone. Many audio interfaces including the Zoom PodTrak P4 include built-in high-pass filters that remove low-frequency rumble and reduce the overall noise floor. Engaging these filters during recording prevents low-frequency noise from affecting your gain staging and reduces the processing load on your computer.
Recording with excessive preamp gain to compensate for poor microphone technique. High gain settings amplify both your signal and all noise sources in the recording chain. Position microphones closer to sources and use proper technique rather than relying on gain to fix positioning problems.
Ignoring the noise floor when setting recording levels. Weak signals require digital makeup gain that amplifies the noise floor along with your audio. Record strong signals that sit well above your equipment noise floor for the cleanest possible results.
Using unbalanced cables in longer runs between microphones and interfaces. Unbalanced connections pick up interference that balanced XLR cables reject effectively. Replace any unbalanced cables longer than 1 metre with proper balanced connections to eliminate induced noise.
Conclusion
Recording hiss comes from identifiable sources in your signal chain and responds to systematic troubleshooting. Proper gain staging, appropriate microphone positioning, and attention to environmental factors eliminate most noise issues without requiring expensive equipment upgrades. Focus on technique and signal path optimisation before pursuing hardware solutions.

FREE DOWNLOAD
Stop Guessing. Start Buying Smart.
The specs that actually matter, demystified.
Headphones, microphones, the spec sheet jargon you can ignore — all in one quick-reference PDF. Free, instant, no fluff.
Send Me the CheatsheetYou'll also receive occasional new guide notifications. Unsubscribe anytime. No spam, ever.