Most home voice over recordings fail not because of cheap equipment, but because the wrong microphone pattern captures more room than voice.
Recording professional voice overs at home has become standard practice across broadcast, commercial, and content creation industries. The technical barrier dropped significantly when decent audio interfaces reached sub-£200 price points, but choosing the right combination of microphone, preamp gain structure, and acoustic environment still separates usable recordings from professional results.
This guide covers the essential equipment chain from microphone selection through monitoring, plus the recording techniques that ensure consistent, broadcast-ready vocal captures in untreated home spaces. The focus remains on practical solutions that work within typical domestic environments rather than purpose-built vocal booths.
Choosing the Right Microphone for Voice Over Work
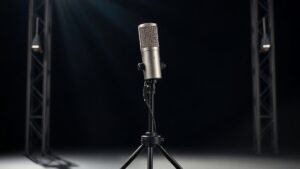
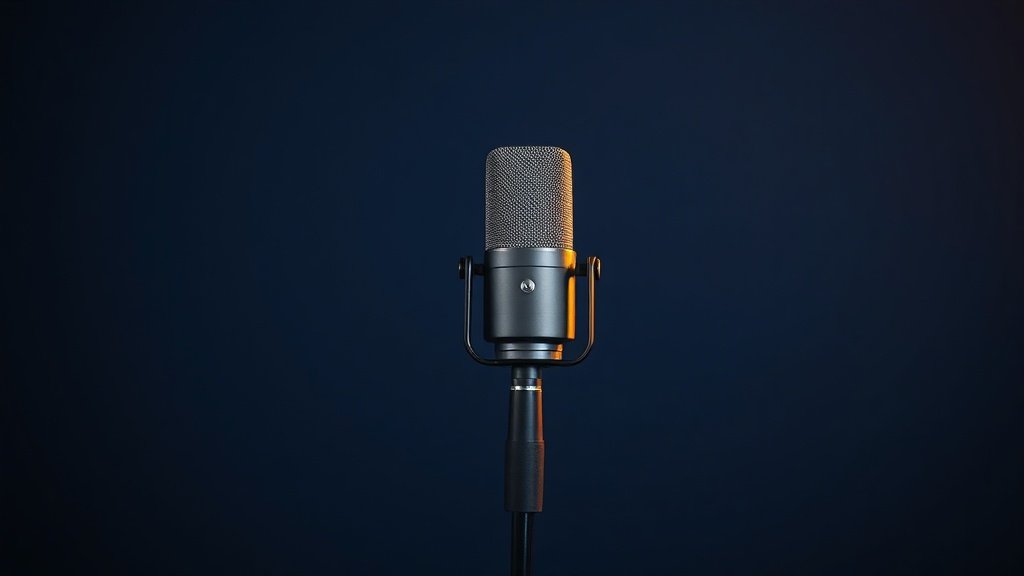
Large diaphragm condenser microphones dominate voice over recording because they capture the full frequency range of human speech with natural presence and detail. The Rode PodMic, despite being a dynamic microphone, has gained popularity for spoken word applications due to its excellent off-axis rejection and reduced sensitivity to room acoustics. However, condensers like the Audio-Technica AT2020 or Shure SM7B remain industry standards for good reason.
Polar pattern selection proves more critical than microphone type for home recording scenarios. Cardioid patterns reject sound from behind the capsule, making them ideal for controlling room reflections and external noise. Omnidirectional patterns capture beautiful, natural vocal tone but also record everything else in the space, including air conditioning, traffic, and room reverb. The Aston Origin offers switchable patterns, allowing comparison between cardioid and omnidirectional modes in your specific recording environment.
Dynamic microphones require more preamp gain than condensers but offer superior rejection of background noise and room acoustics. The Shure SM58, whilst designed for live performance, can produce excellent voice over results when positioned correctly, particularly for male voices that benefit from its midrange emphasis. The proximity effect becomes more pronounced with dynamic microphones, requiring consistent positioning to maintain tonal balance across long recording sessions.
The microphone pattern you choose determines whether you record your voice or your room.
Audio Interface Requirements and Preamp Considerations
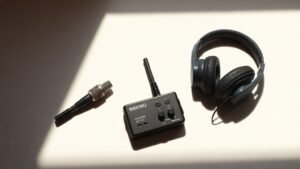
Voice over recording demands clean preamp gain without noise or distortion, particularly when working with dynamic microphones that require significant amplification. The Focusrite Scarlett Solo provides adequate preamp quality for condenser microphones, but dynamic microphones often push its gain structure to the limits, introducing noise in the upper gain ranges. Moving to interfaces like the Zoom PodTrak P4 or Focusrite Scarlett 2i2 provides better headroom and lower noise floors for demanding microphone combinations.
Phantom power requirements vary by microphone type, with all condenser microphones requiring 48-volt phantom power for operation. Most audio interfaces provide phantom power as standard, but checking power supply capacity becomes important when running multiple condenser microphones simultaneously. The PreSonus AudioBox USB 96 delivers reliable phantom power for single microphone setups, whilst the Focusrite Scarlett 18i20 handles multiple condensers without voltage drop issues.
Direct monitoring capabilities eliminate the latency between speaking and hearing your voice through headphones, which proves essential for natural delivery and timing. Software monitoring introduces delays that disrupt natural speech patterns and make it difficult to maintain consistent energy and pacing. Hardware monitoring circuits in interfaces like the Behringer U-Phoria UM2 allow zero-latency monitoring whilst recording, though the monitoring quality varies significantly between interface price points.
Acoustic Treatment and Room Optimisation
Controlling room acoustics matters more than expensive microphones for professional voice over results. Hard surfaces reflect sound waves back to the microphone, creating comb filtering and hollow, echoey recordings that immediately identify amateur productions. Temporary acoustic treatment often works better than permanent solutions for home recording, particularly in shared living spaces where dedicated studio treatment is not practical.
Moving blankets hung behind and to the sides of the recording position create effective absorption for mid and high frequencies where speech intelligibility lives. The key lies in creating an acoustically dead zone around the microphone rather than treating the entire room. Recording in wardrobes filled with clothing, under duvets, or in corners with heavy curtains can produce surprisingly professional results by eliminating early reflections that reach the microphone capsule.
Portable vocal booths like the Aston Halo or SE Electronics Reflexion Filter attempt to solve acoustic problems at the source by surrounding the microphone with absorptive material. These solutions work best in moderately treated spaces but cannot overcome severely problematic room acoustics. The effectiveness varies significantly based on microphone polar pattern, with cardioid microphones benefiting more than omnidirectional patterns from localised acoustic treatment.
Recording Technique and Microphone Positioning
Microphone distance and angle dramatically affect vocal tone, presence, and the amount of room sound captured in the recording. Positioning the microphone 15-30 centimetres from the mouth provides the optimal balance between intimate presence and natural tone for most voice over applications. Closer positioning increases proximity effect, adding bass weight that can sound impressive but may require equalisation to maintain speech clarity and intelligibility.
Speaking across the microphone capsule rather than directly into it reduces plosive sounds from ‘P’ and ‘B’ consonants without requiring pop filters. This technique works particularly well with large diaphragm condensers where the capsule orientation allows off-axis positioning whilst maintaining good frequency response. The Rode Procaster, designed specifically for broadcast applications, incorporates internal pop filtering that allows direct address without external accessories.
Consistent positioning throughout recording sessions ensures tonal consistency across takes and reduces post-production work. Using visual reference points, adjustable boom stands, or desktop stands with consistent positioning helps maintain the same microphone-to-mouth distance and angle. The Rode PSA1 boom arm provides sufficient adjustment range and stability for extended recording sessions whilst maintaining repeatable positioning between takes.
Monitoring and Recording Chain Setup
Accurate monitoring allows real-time assessment of recording quality, vocal performance, and technical issues that might require retakes. Closed-back headphones prevent audio bleeding into the microphone whilst providing isolation from external sounds that could disrupt performance. The Sony MDR-7506 remains an industry standard for recording applications, offering accurate frequency response and excellent isolation properties for voice over monitoring.
Setting appropriate recording levels requires balancing signal-to-noise ratio against digital headroom to prevent clipping during loud passages. Recording peaks around -12dB to -6dB provides adequate headroom for dynamic speech whilst keeping noise floors below audible thresholds. Modern 24-bit recording allows conservative level setting without sacrificing quality, unlike older 16-bit systems that required recording closer to maximum levels to avoid quantisation noise.
The complete signal chain from microphone through interface to computer should maintain clean signal path without introducing noise, distortion, or frequency response irregularities. Using balanced XLR connections between microphone and interface eliminates noise pickup from electrical interference, whilst quality USB or Thunderbolt connections to the computer prevent dropouts and maintain stable sample rates during long recording sessions.
Recording too close to the microphone creates boomy, unnatural vocal tone. Proximity effect adds excessive bass that sounds impressive during recording but creates problems during mixing and broadcast. Position microphones 15-30 centimetres from your mouth for natural tone balance.
Using omnidirectional microphones in untreated rooms captures more space than voice. Room reflections and ambient noise overwhelm the direct vocal signal, creating hollow, unprofessional recordings. Choose cardioid pattern microphones for home recording environments.
Monitoring through computer speakers whilst recording creates feedback loops and timing issues. Open monitoring allows sound to leak into the microphone and creates latency that disrupts natural speech delivery. Always use closed-back headphones with direct monitoring from your audio interface.
Conclusion
Professional voice over recording at home succeeds through careful microphone selection, proper acoustic control, and consistent recording technique rather than expensive equipment. Focus on cardioid pattern microphones, create dead acoustic space around the recording position, maintain consistent positioning, and monitor through quality headphones for broadcast-ready results in any domestic environment.

FREE DOWNLOAD
Stop Guessing. Start Buying Smart.
The specs that actually matter, demystified.
Headphones, microphones, the spec sheet jargon you can ignore — all in one quick-reference PDF. Free, instant, no fluff.
Send Me the CheatsheetYou'll also receive occasional new guide notifications. Unsubscribe anytime. No spam, ever.