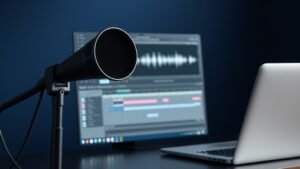
Every microphone reaches a breaking point where clean signal transforms into harsh distortion, yet most engineers discover this limit during the worst possible moment of an important session.
Microphone headroom defines the difference between the loudest signal a mic can handle cleanly and its typical operating level. When you exceed this threshold, the capsule, preamp circuitry, or output transformer saturates, creating audible distortion that ruins recordings. Understanding maximum SPL ratings prevents these failures and guides proper microphone selection for loud sources.
This guide examines how microphone headroom works, why different designs handle loud sources differently, and which specifications matter when recording everything from thunderous kick drums to screaming guitar amplifiers. We will explore practical measurement techniques and real-world applications across various microphone types.
How Maximum SPL Ratings Work
Maximum Sound Pressure Level specifications indicate the loudest sound a microphone can capture before introducing one percent Total Harmonic Distortion. Manufacturers measure this figure using pure sine waves at 1kHz, typically rating performance at both one percent and 0.5 percent THD thresholds. A Neumann U87 handles 117dB SPL at one percent THD, whilst the Shure SM57 manages an impressive 140dB SPL due to its robust dynamic design.
The measurement conditions matter significantly. Some manufacturers quote maximum SPL with the attenuation pad engaged, inflating apparent performance. Others specify peak levels versus RMS levels, creating confusion when comparing specifications. Always check whether ratings include built-in pads and verify measurement standards before making headroom comparisons.
Condenser microphones generally offer lower maximum SPL ratings than dynamic designs because their active electronics introduce distortion before the capsule reaches mechanical limits. Ribbon microphones fall between these extremes, with modern designs like the Royer R121 handling 135dB SPL whilst vintage ribbons often distort around 120dB SPL.
Where Distortion Actually Occurs
Three primary components limit microphone headroom: the capsule diaphragm, internal electronics, and output transformer. In condenser microphones, the head amplifier circuit usually distorts first, especially in phantom-powered designs where voltage rails limit clean signal handling. The Audio-Technica AT4050 addresses this through careful circuit design, achieving 139dB SPL maximum despite its condenser architecture.
Dynamic microphone capsules can handle enormous sound pressures mechanically, but the voice coil and magnet assembly create natural compression at extreme levels. This explains why dynamics like the Electro-Voice RE20 maintain clarity on loud sources that overwhelm condensers. The magnetic flux density and voice coil design determine these mechanical limits.
Ribbon microphones face unique challenges because their delicate aluminum elements can stretch permanently under excessive SPL. Modern ribbons use stronger materials and improved tensioning, but older designs like vintage RCA 44s require careful handling around loud sources to prevent permanent damage.
Maximum SPL ratings reveal the exact moment when clean recording transforms into unusable distortion.
Measuring Real-World Source Levels
Acoustic drums generate the highest SPL levels in typical recording situations. A snare drum crack measures 100-105dB SPL at one metre, whilst kick drums reach 105-110dB SPL depending on tuning and playing dynamics. Moving the microphone closer dramatically increases these figures due to inverse square law principles. Position a dynamic microphone six inches from a snare and expect levels approaching 120dB SPL during aggressive playing.
Guitar amplifiers produce surprisingly high SPL levels that catch engineers unprepared. A Marshall JCM800 running at moderate volume generates 110dB SPL at one metre, reaching 125dB SPL when pushed hard. Valve amplifier distortion adds harmonic content that increases peak levels beyond fundamental measurements. Always measure actual SPL levels using a calibrated meter rather than estimating from amplifier settings.
Brass instruments create focused acoustic energy that challenges microphone headroom in unexpected ways. A trumpet bell produces 130dB SPL peaks at close range, whilst trombone slides can exceed 135dB SPL during fortissimo passages. These transient peaks often surpass RMS measurements by 10-15dB, requiring additional headroom margin for clean capture.
Choosing Microphones for High SPL Applications
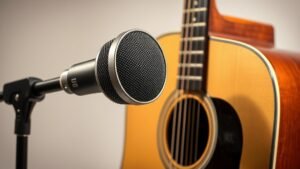
Dynamic microphones excel in high SPL environments because their passive design eliminates electronic distortion paths. The Shure Beta 52A handles 140dB SPL maximum, making it ideal for close-miked kick drums and bass guitar amplifiers. Similarly, the Sennheiser MD421 manages 130dB SPL whilst providing excellent frequency response for toms and guitar cabinets.
When condenser microphones are necessary for their sensitivity and frequency response, select models with high maximum SPL ratings and built-in attenuation pads. The AKG C414 provides switchable 10dB and 20dB pads, extending its 140dB SPL rating even further for extreme applications. These pads reduce signal level before reaching the head amplifier, preventing electronic distortion.
Consider microphone placement carefully to manage SPL exposure. Moving a microphone from six inches to twelve inches from a loud source reduces SPL by approximately 6dB due to distance doubling. This technique often provides sufficient headroom improvement without requiring different microphone selection. Combine strategic placement with appropriate microphone choice for optimal results.
Preventing Headroom Problems
Always measure actual SPL levels during rehearsals or sound checks using a calibrated sound level meter. Position the meter where you plan to place microphones and note both average and peak readings. Add 6-10dB safety margin to peak measurements when comparing against microphone specifications to account for unexpected dynamic peaks.
Enable attenuation pads on condenser microphones when source SPL approaches 110dB or higher. These pads typically reduce signal level by 10-20dB, effectively extending maximum SPL handling. Remember that pads also reduce microphone sensitivity, requiring additional preamp gain to achieve proper recording levels. This trade-off usually improves signal quality by preventing microphone distortion.
Monitor for distortion signs during recording sessions. Microphone overload creates harsh, gritty textures that differ from pleasant amplifier or tape saturation. Use headphones to identify these artifacts early, before they compromise entire takes. Install SPL meters or peak indicators in critical recording positions for continuous monitoring during sessions.
Assuming condenser microphones always sound better than dynamics on loud sources. Dynamic microphones often provide cleaner results on high SPL sources because they avoid the electronic distortion that limits condenser designs. Choose microphones based on headroom requirements rather than general quality perceptions.
Ignoring attenuation pad settings when recording loud sources. Built-in pads effectively extend microphone headroom by reducing signal level before internal amplification stages. Engage these switches proactively rather than discovering distortion problems during mixing sessions.
Estimating source SPL levels instead of measuring them accurately. Acoustic measurements often surprise engineers with their intensity, especially at close microphone positions. Use calibrated SPL meters to determine actual levels and select appropriate microphones based on measured data rather than assumptions.
Conclusion
Microphone headroom determines recording success when capturing powerful acoustic sources. Understanding maximum SPL ratings, measurement conditions, and distortion mechanisms enables informed microphone selection and placement decisions. Measure source levels accurately, choose appropriate microphone types, and engage attenuation pads when necessary to maintain clean signal paths throughout your recording chain.

FREE DOWNLOAD
Stop Guessing. Start Buying Smart.
The specs that actually matter, demystified.
Headphones, microphones, the spec sheet jargon you can ignore — all in one quick-reference PDF. Free, instant, no fluff.
Send Me the CheatsheetYou'll also receive occasional new guide notifications. Unsubscribe anytime. No spam, ever.