Place a bass trap in the wrong position and you will spend money on foam that does almost nothing while low-end problems continue to wreck every mix you try to evaluate in the room.
Low-frequency energy is the most difficult acoustic problem in any small studio, and it is the one most engineers underestimate when they first set up a room. Bass waves are long relative to the dimensions of a typical project studio or home recording space. That length mismatch means they reflect, reinforce, and cancel in ways that create dramatic peaks and nulls at specific points in the room, and those points are often exactly where you sit to mix.
This guide covers how bass traps actually work, where low-frequency energy concentrates in a small room, how to position treatment for maximum absorption, how much material you realistically need, and how to verify that what you have installed is doing its job. None of this requires specialist tools beyond a calibration microphone and a free measurement application, both of which are accessible to any working engineer today.
Why Low Frequencies Behave Differently From Mid and High Frequencies
Mid and high frequencies are relatively easy to manage because their wavelengths are short enough that foam panels, fabric-wrapped rockwool, and diffusion surfaces all interact with them in predictable, controllable ways. A 4 kHz wave has a wavelength of roughly 8.5 centimetres. A 100 Hz wave has a wavelength of around 3.4 metres. That 3.4-metre wave does not care about a 5-centimetre foam tile. It passes straight through or around it as if the foam is not there.
This is why thin decorative acoustic foam sold in egg-crate or wedge profiles has almost no effect on bass. The material has to be physically thick, dense, and ideally placed where the particle velocity of the wave is highest. At low frequencies, that velocity peak occurs at room boundaries: corners, floor-ceiling junctions, and wall-to-wall junctions. This is the foundational principle that determines everything about how you position bass traps in practice.
Room modes are the specific resonant frequencies at which your room naturally sustains energy. They are calculated from the room dimensions and they create the characteristic honk or boom that makes a snare hit on your monitor sound completely different from the same snare on headphones or in a different room. In a small room measuring, for example, 3 metres by 4 metres by 2.4 metres, you will have axial modes stacking up in the low hundreds of hertz range, and they will interact badly with each other at the mix position.
Where to Place Bass Traps for Maximum Effect
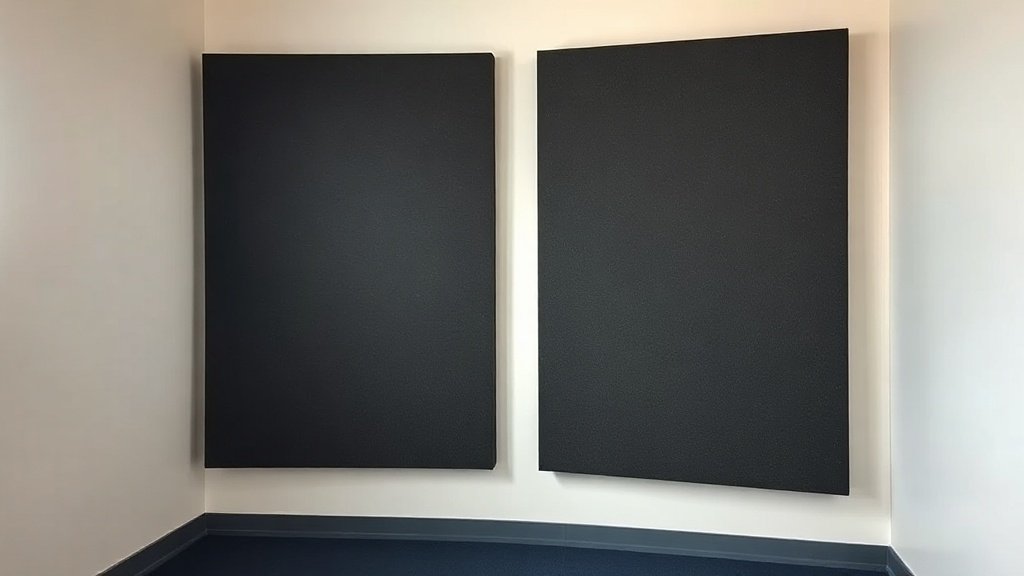
The most effective single location for a bass trap in any rectangular room is a vertical corner where two walls meet. Tri-corner positions, where two walls and the ceiling or floor all meet simultaneously, are even more effective because multiple room modes converge at that point. If you can treat only one area, treat the four vertical corners from floor to ceiling before you treat anything else.
Floor-to-ceiling corner placement matters more than people realise. A bass trap placed only at head height in a corner will address modes at that height but leave the floor and ceiling junctions essentially untreated. The vertical corners behind your mix position and behind the speakers should be fully treated from floor to ceiling. Products such as Vicoustic Super Bass Extreme or the GIK Acoustics 244 Bass Trap are designed to mount in corners and offer genuine broadband absorption down into the low-frequency range when stacked or built out to sufficient depth.
The wall behind the mix position and the wall behind the speakers are the two most critical surfaces after the corners. The first reflection points on the side walls matter more for mid-frequency imaging than for bass control, so once your corners are covered, the front and rear walls should receive your next priority. Building a broadband panel that combines a low-frequency absorber with a mid-frequency layer at the rear wall gives you the most efficient use of surface area in a small room where space is always the limiting factor.
A bass trap placed at head height in one corner is not bass treatment. It is a good start in entirely the wrong configuration.
How Thick Does the Treatment Need to Be
Depth is the single most important variable in bass trap performance, and it is the one that most budget acoustic panels compromise on. A 10-centimetre rockwool or mineral wool panel begins to absorb meaningfully around 200 to 250 Hz at best. To push absorption down toward 80 or 100 Hz, you need material that is 30 centimetres thick or more, or you need to use an air gap behind the panel to extend the effective absorption range without proportionally increasing the material depth.
An air gap works because the particle velocity of a bass wave peaks at the boundary and then again at a quarter wavelength away from that boundary. Mounting a 10-centimetre panel 15 centimetres away from the wall rather than flush against it effectively shifts its absorption curve downward in frequency. This is a practical technique that lets you get more low-end performance from panels that would otherwise only address the mid-bass region. GIK Acoustics publishes absorption coefficient data for their panels at various air gaps, which makes specification comparisons straightforward when you are planning a room.
Corner placement with superchunk construction is the most effective approach for very small rooms with severe modal problems. A superchunk is built by cutting triangular sections of rigid fibreglass or rockwool board, stacking them into the corner from floor to ceiling, and facing them with fabric. The depth achieved by filling the entire corner triangle can reach 40 to 60 centimetres at the deepest point, which provides absorption reaching down toward 60 to 80 Hz in a meaningful way. This is not achievable with any panel product that simply hangs flat against a wall.
How to Measure Whether Your Treatment Is Working
Guessing is not a strategy when it comes to acoustic treatment. A calibrated measurement microphone such as the Earthworks M30 or the more accessible MiniDSP UMIK-1 connected to Room EQ Wizard, which is free software, will show you your room frequency response, RT60 decay times, and waterfall plots that reveal exactly where energy is hanging in the room and for how long. Running these measurements before and after treatment installation tells you objectively what you have achieved and where the remaining problems are.
What you are looking for in the low-frequency waterfall is energy that decays quickly and evenly across the frequency range. A well-treated room shows similar decay times from 100 Hz up through the mid-range. An untreated room shows long hanging tails at specific modal frequencies, often 80 Hz, 100 Hz, 120 Hz, or wherever the room dimensions create resonances. After installing corner bass traps, re-run the measurement at the mix position. You should see those modal tails shorten, though eliminating them entirely in a small room is rarely achievable without broadband treatment covering a significant percentage of the total room surface area.
Measurement also tells you whether a room EQ correction plugin or an outboard unit such as the IK Multimedia ARC System 3 is doing genuine work or papering over physics. Room EQ can address the frequency response at the mix position, but it cannot reduce the decay time of a room mode. If a bass frequency rings for 400 milliseconds after a transient, applying EQ cuts that frequency at the monitor output but the room is still excited by it and still decaying at that rate. Physical treatment and measurement go together. One without the other leaves significant problems unresolved.
Common Configuration Mistakes That Reduce Effectiveness
Treating only the first reflection points is the most common acoustic treatment mistake in small home studios. First reflection treatment on the side walls addresses mid and high frequencies and can improve imaging and clarity at the mix position, but it does nothing to control the room modes that create low-frequency inaccuracy. Engineers who add four 5-centimetre foam panels to their side walls and call the room treated are still working in a room with uncorrected bass response.
Placing bass traps only at the front of the room behind the monitors addresses one set of room boundary reflections but ignores the rear wall and rear corners, which are equally important for modal control. The room is a three-dimensional system and modes exist between all opposing boundaries simultaneously. Treating only one pair of boundaries leaves the modes associated with the other two pairs completely active.
How Much Treatment Is Enough for a Small Room
There is no universal percentage that applies to every room, but a common practical starting point for a small mixing room is to ensure that all four vertical corners are fully treated from floor to ceiling, that broadband panels cover at least 30 to 40 percent of the rear wall, and that the ceiling cloud includes some low-frequency absorption depth rather than purely mid and high-frequency treatment. This level of treatment will not deliver a perfectly flat room response but it will reduce the severity of modal problems enough to make mixing decisions more reliable when cross-referenced with calibrated headphones such as the Audeze LCD-X or Beyerdynamic DT 1990 Pro.
Working engineers in small rooms routinely use a combination of physical treatment, measurement, careful mix position optimisation, and headphone cross-referencing to arrive at reliable results. No small room is acoustically perfect and trying to achieve perfection through treatment alone leads to diminishing returns quickly. The goal is to reduce gross inaccuracy, shorten modal decay times to a manageable level, and create a space where informed mixing decisions are possible rather than a space that flatters every mix it plays back.
Placing thin foam tiles across a wall and calling it bass treatment is a mistake that wastes both money and space. Thin foam has no meaningful effect below 300 Hz. Use dense mineral wool or rigid fibreglass board at a minimum depth of 10 centimetres, and position it in corners rather than flat on walls for maximum low-frequency benefit.
Treating the room without measuring it before and after means you have no way to know whether your treatment is working. A MiniDSP UMIK-1 and Room EQ Wizard provide objective waterfall and decay data that show exactly which modal frequencies remain problematic and where further treatment is needed.
Applying room EQ correction without physical treatment first is treating the symptom and leaving the cause completely in place. EQ adjustment at the mix position cannot reduce the decay time of a room mode, and a ringing mode will continue to mask transient detail and obscure low-frequency timing even when the frequency response curve looks flat on a graph.
Conclusion
Bass traps work when they are thick enough, positioned in corners from floor to ceiling, and verified with measurement tools rather than guesswork. In a small studio, controlling low-frequency modal energy is the single intervention that most improves the reliability of mixing decisions. Physical treatment, careful measurement, and realistic expectations about what a small room can achieve will consistently outperform any approach that prioritises aesthetics over acoustic physics.

FREE DOWNLOAD
Stop Guessing. Start Buying Smart.
The specs that actually matter, demystified.
Headphones, microphones, the spec sheet jargon you can ignore — all in one quick-reference PDF. Free, instant, no fluff.
Send Me the CheatsheetYou'll also receive occasional new guide notifications. Unsubscribe anytime. No spam, ever.