The distance between a convincing sound effect and a useless one is almost never about the source material. It is about how you capture it.
Foley recording has been a professional craft since the early days of cinema, but the core principle has not changed: you recreate or enhance sound in a controlled environment to serve a specific editorial purpose. What has changed is that a well-treated spare room and a modest microphone collection can now produce results that would have required a dedicated stage not long ago. The gap between professional and home results has narrowed considerably, but only if you understand where the real variables live.
This guide covers microphone selection and polar patterns for different types of sound effects, interface gain considerations, acoustic treatment for a home foley space, stereo and mono capture decisions, and the common errors that turn a promising session into hours of unusable audio. Whether you are recording footsteps for a short film, designing ambience for a podcast, or building a personal sound library, the same technical principles apply throughout.
Microphone Choice for Foley Work
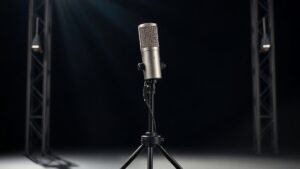
The microphone you reach for first depends entirely on what you are recording. For close, detailed foley work such as clothing rustle, small object handling, and texture sounds, a large diaphragm condenser like the Rode NT1 or the Audio-Technica AT4040 gives you the sensitivity and low self-noise to capture fine detail without introducing noise floor problems. These microphones have self-noise figures below 5 dB-A, which matters enormously when you are recording quiet sources at close range.
For harder, percussive effects like footsteps, prop impacts, and door slams, a small diaphragm condenser often handles transients more accurately. The Rode NT5 and the Neumann KM 184 are both well regarded for this reason. Their tighter diaphragms track fast transient information without the slight low-frequency buildup that large diaphragm condensers can exhibit when working very close to a source. For particularly aggressive transient material, a dynamic microphone like the Shure SM7B handles peaks without clipping and can be positioned extremely close without proximity effect becoming unmanageable.
Shotgun microphones deserve mention here too. The Rode NTG3 or the Sennheiser MKH 416 are both used professionally in foley studios precisely because their tight supercardioid or lobar patterns reject room sound aggressively. In a home environment where your acoustic treatment is imperfect, a shotgun positioned close to the sound source can reduce the amount of room character you capture, giving you drier, more usable raw material that sits cleanly in a mix.
Polar Patterns and Placement Strategy
Understanding polar patterns is not optional in foley work. A cardioid pattern rejects sound arriving from behind the microphone capsule, which is useful when you need to isolate a specific source from ambient noise or nearby reflections. Placing a cardioid microphone so that the rear null points toward a reflective wall or a noisy appliance can make a significant difference to the cleanliness of your recording without any acoustic treatment at all.
Omnidirectional patterns capture sound equally from all directions, which sounds counterintuitive for a home environment, but they have real uses in foley. Omni patterns have no proximity effect, so you can place the microphone very close to a source without bass buildup, and they tend to sound more natural and open on certain materials. If your room is reasonably well treated or if you are working in a small dead space like a wardrobe lined with clothing, an omni can capture a more honest representation of a textural sound. The Rode NT-SF1 in its various configuration modes can demonstrate this difference directly if you have the opportunity to test it.
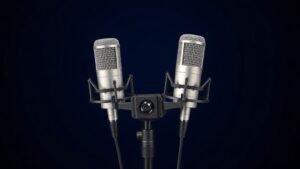
For stereo sound effects and ambience recording, a coincident XY pair using two small diaphragm condensers gives you a stable, mono-compatible stereo image that works well in post-production. The Rode NT5 ships as a matched pair precisely for this application. Spaced omni pairs give a wider image but introduce phase issues that can be problematic when the material is heard in mono, which remains a requirement in broadcast and many online delivery formats. Stick with coincident or near-coincident techniques unless you are confident the material will only ever be heard in stereo.
The microphone polar pattern is doing more acoustic treatment work than most home recordists realise, and choosing it deliberately is faster than foam on every wall.
Audio Interfaces and Gain Staging for Sound Effects
Foley recording places unusual demands on your audio interface because the dynamic range of source material is extremely wide. A quiet fabric rustle might require 60 to 65 dB of clean gain, while a door slam or a heavy footstep might clip the same preamp at that setting. You need an interface with low-noise preamps and enough headroom to handle peaks without distortion, and you need to think carefully about gain staging before each session rather than setting a level and leaving it.
Interfaces like the Universal Audio Apollo Twin X, the Focusrite Scarlett 4i4 fourth generation, and the Audient iD14 mkII all offer preamp performance that is more than adequate for home foley work. The Apollo Twin X has the lowest equivalent input noise of the three, which helps with very quiet sources, but for most foley material the Scarlett and Audient preamps are clean enough that the difference is academic. What matters more is setting your input gain so that your loudest expected transient peaks land no higher than minus 6 dBFS on the meter, leaving yourself enough headroom to avoid clipping during unexpected loud moments.
Recording at 24-bit depth rather than 16-bit gives you approximately 48 dB of additional dynamic range at the bottom of the signal, meaning you can record conservatively and still have a clean signal when you normalise or adjust levels in post. Sample rate choice matters less for foley than for music recording, but 48 kHz is the standard for video post-production work, so match your session to the delivery format from the start rather than converting later.
Acoustic Treatment and Working Spaces at Home
You do not need a purpose-built foley stage to get usable results, but you do need to understand what your room is contributing to the recording and whether that contribution helps or hurts. Hard, parallel walls create flutter echo that reads as a boxy, unnatural reverb tail on recordings. This is rarely useful in foley because it makes it harder to place sounds convincingly in a mix that may have its own reverb applied. The goal in most home foley recording is a dry, dead capture that you can treat with whatever room character the picture demands.
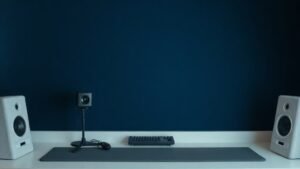
Practical treatment does not require expensive dedicated panels. Recording inside a wardrobe or walk-in cupboard filled with clothing absorbs high and mid frequencies effectively. A duvet placed over a frame or a piece of furniture behind the microphone can function as a rear absorber. If you are working at a desk, a reflection filter like the Rode VXLR or the SE Electronics Reflexion Filter Pro positioned behind the capsule reduces early reflections from the wall behind you. None of these solutions are perfect, but combined they can reduce room character to a level where it is not obviously audible in the final recorded material.
One approach that professional foley artists use regularly is to match the acoustic character of the recording environment to the visual environment in the picture. A scene set outdoors in a garden does not need the most dead recording you can achieve. Recording footsteps on real gravel outside your back door, with the natural open acoustic of an outdoor space, can save considerable time in post compared to trying to add that character artificially to a dead indoor recording. When conditions allow, take the microphone to the source rather than always bringing the source to the microphone.
Monitoring Your Foley Recordings Accurately
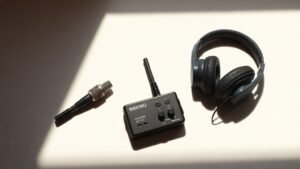
Headphones are the dominant monitoring tool for home foley work because they let you hear fine detail, background noise, and room character that may not be obvious on speakers in an untreated space. Closed-back headphones with a flat, extended frequency response are the right choice here. The Beyerdynamic DT 770 Pro in its 80-ohm version gives you good isolation from external sound during recording and a response that reveals low-level noise clearly. The Sony MDR-7506 remains a standard tool in post-production environments for the same reason: it is forward in the upper midrange, which makes handling noise and breath sounds obvious in a way that a more flattering headphone might conceal.
Open-back headphones like the Sennheiser HD 600 or the Beyerdynamic DT 990 Pro offer a more natural, spacious presentation that is useful when you are reviewing finished sound design or checking how effects sit in a mix, but they bleed sound from the driver into the microphone during recording, so keep them for playback rather than capture sessions. Switching between closed-back monitoring during recording and open-back monitoring during review is a workflow habit that serves foley editors well at any level of setup.
Recording with too much gain to avoid having to normalise later is one of the most common errors in home foley sessions. Clipped transients from footsteps or impacts cannot be recovered in post, and the fix costs far more time than simply setting a conservative gain level from the start.
Using a microphone with a figure-of-eight or wide cardioid pattern in an untreated room produces recordings dominated by room sound rather than source sound. A tighter polar pattern or a closer microphone position reduces room contribution far more effectively than foam panels on one wall, so address the polar pattern before addressing the treatment.
Recording every foley element at a different sample rate or bit depth because sessions were set up without a delivery specification in mind creates conversion problems downstream. Establish 48 kHz at 24-bit as your default for any work destined for video, and do not change it mid-project even if one session seems to call for a different setting.
Conclusion
Home foley recording is a discipline that rewards methodical thinking more than expensive gear. A low-noise small diaphragm condenser, a clean preamp, conservative gain staging, and a deliberate approach to polar pattern and placement will take you further than any number of acoustic panels applied without a clear plan. Treat each session as a series of specific technical decisions rather than a creative free-for-all, and the results will be usable from the first take rather than rescued in post.

FREE DOWNLOAD
Stop Guessing. Start Buying Smart.
The specs that actually matter, demystified.
Headphones, microphones, the spec sheet jargon you can ignore — all in one quick-reference PDF. Free, instant, no fluff.
Send Me the CheatsheetYou'll also receive occasional new guide notifications. Unsubscribe anytime. No spam, ever.