Recording multiple voices in a domestic space sounds like a recipe for disaster, yet the same principles that govern a professional choral session scale down surprisingly well to a living room or converted bedroom studio.
The challenge with recording a choir or vocal ensemble at home is not really about gear. It is about understanding how sound behaves in a small, reflective space and making decisions that work with that environment rather than against it. Most home rooms are too live in the wrong frequencies and too dead in others, which means a naive approach to microphone placement will capture more room than voice. Getting this right requires thinking about the relationship between your singers, your microphones, and your walls before you press record.
This guide covers room preparation, microphone selection and polar patterns, stereo techniques suited to ensembles, interface and gain considerations, and the most common errors that engineers make when they attempt choral recording outside a purpose-built space. Whether you are recording a four-part a cappella group or a twenty-voice community choir, the same foundational decisions apply.
Preparing the Room Before Anything Else
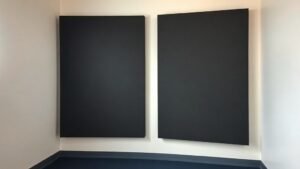
The room is your first instrument and your biggest variable. Hard parallel walls create standing waves and flutter echo that will smear the blend of your ensemble and make individual voices sound harsh on playback. Before you position a single microphone, walk around the space and clap your hands sharply. If you hear a metallic ping or a rapid repeating slap, you have a flutter echo problem that will appear in your recording regardless of how good your microphones are. The solution is not to add acoustic foam everywhere, which absorbs high frequencies but does little for the low-mid buildup that makes choral recordings sound muddy. Instead, use heavy curtains, bookshelves filled with unevenly sized objects, thick rugs on hard floors, and if you can access them, broadband absorbers such as Rockwool or Owens Corning 703-filled panels positioned at the first reflection points on the side walls.
For a small ensemble of four to eight singers, a room roughly five by six metres with a ceiling height of at least 2.4 metres gives you enough space to place the group sensibly without the microphones sitting too close to reflective surfaces. Turn off HVAC systems, refrigerators, and any appliance with a compressor motor. These produce low-frequency rumble and broadband hiss that a sensitive condenser microphone will capture clearly. If the room has a wooden floor, consider placing the ensemble on a thick rug to reduce footfall and low-frequency coupling from the building structure.
Choosing the Right Microphones for Ensemble Recording
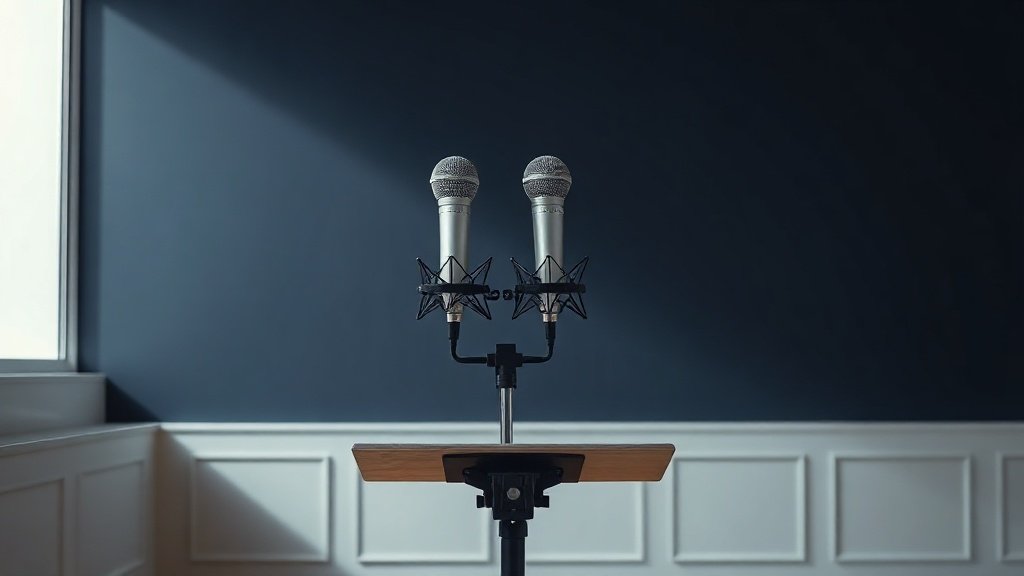
For choral and ensemble work, small diaphragm condenser microphones in matched pairs are the professional standard because they offer a consistent frequency response across the stereo field and handle transients cleanly. The Rode M5 matched pair is an accessible and genuinely capable option that performs well above its price point in spaced and coincident stereo configurations. If your budget extends further, the Oktava MK-012 in matched pairs delivers an open, detailed top end that flatters vocal harmonics without adding the proximity-effect warmth you would get from a large diaphragm microphone placed too close to the ensemble.
Large diaphragm condensers can also work well, particularly if you are recording a smaller ensemble of three to six voices and want a slightly fuller, warmer character in the low mids. The AKG C414 XLII in cardioid mode is a recognised choice for this application because its pattern is consistent and its self-noise is low enough to handle the moderate SPL levels of an unamplified vocal group. A matched stereo pair of C414s on an XY or ORTF configuration above and in front of the ensemble will capture a wide, stable image with good depth. Note that a single large diaphragm microphone is rarely sufficient for ensemble recording because it cannot capture the spatial spread of multiple voices without significant comb filtering artefacts.
Ribbon microphones are worth considering if you want a natural, slightly rolled-off high end that avoids the harshness that cheaper condensers can introduce on loud upper harmonics. The Royer R-10 is a figure-of-eight ribbon that works exceptionally well in a Blumlein pair configuration, capturing the full ensemble spread with a rear pickup that, when your room treatment is adequate, adds a pleasing natural reverb tail rather than an unwanted reflection. Ribbons are delicate and require phantom-power-free preamplifiers, so confirm your interface handles this correctly before committing.
Stereo Techniques That Work in Small Spaces
The stereo technique you choose directly determines how wide the ensemble sounds and how much room the recording captures. In a professional concert hall you would use a spaced pair because the room ambience is a desirable part of the recording. In a treated home space, a coincident or near-coincident technique gives you a more controlled image with less room in the signal.
An XY configuration using two cardioid microphones angled at 90 degrees and placed with the capsules overlapping vertically is the most phase-coherent option. The stereo width is modest but the mono compatibility is excellent, which matters if the recording will be mixed with additional instruments or processed in post. ORTF, which positions two cardioid capsules 17 centimetres apart at a 110-degree angle, gives a wider image that is closer to what the ear perceives as natural width while retaining good phase coherence. A stereo bar such as the Rycote stereo bar or the Rode stereo bar makes setting either of these configurations repeatable and precise, which matters because even a small shift in capsule angle changes the image noticeably with a vocal ensemble.
For a Blumlein configuration using figure-of-eight microphones, the pickup from the rear lobes must be managed carefully. In a well-treated room this is a beautifully natural and enveloping technique. In an untreated domestic space the rear lobes will capture wall reflections that arrive late enough to cause audible smearing. Test the Blumlein technique by recording a short passage and listening back on headphones such as the Beyerdynamic DT 880 Pro, which resolves room character clearly, before committing to an entire session with it.
In ensemble recording, microphone placement decisions made in the first ten minutes of setup determine seventy percent of what is retrievable in the mix.
Interface Gain, Headroom, and Channel Count
A vocal ensemble at moderate dynamics will peak at around 80 to 90 dB SPL at the microphone position, which is lower than a single lead vocalist close-miking a large diaphragm capsule. This means your preamplifiers need to apply significant gain, typically 40 to 55 dB, to bring the signal to a healthy recording level. At this gain level the noise floor of your interface preamplifiers becomes audible, so the quality of your preamps matters more for ensemble recording than for close-miked sources.
The Universal Audio Apollo Twin X and the Focusrite Scarlett 18i20 sit at opposite ends of the price range but both provide sufficient headroom and low enough self-noise for this application. The Apollo Twin X offers two channels of UA-designed preamp with a very low equivalent input noise specification that keeps the ensemble signal clean at high gain settings. If you need more than two channels, the Focusrite Clarett Plus 8Pre gives you eight channels of Clarett-series preamps with enough clean gain for a double-microphone stereo setup plus room microphones or close spot microphones if you choose to use them. Set your recording level so the ensemble peaks at around negative 12 to negative 18 dBFS to preserve headroom for dynamic peaks in the louder passages.
Microphone Placement Relative to the Ensemble
Height and distance are the two most misunderstood variables in ensemble microphone placement. Placing the stereo pair too close, say less than one metre from the front row, means the microphone hears the front singers louder than the back rows and captures too little of the blend. The voices need acoustic space to mix in the air before they reach the capsules. A general starting point is to position the stereo pair at a height of roughly 1.8 to 2.2 metres and at a distance of 1.5 to 2.5 times the width of the ensemble. For a group of ten singers arranged in two rows spanning approximately three metres, this means a microphone distance of roughly 4.5 to 7.5 metres, which is unlikely to be achievable in a domestic room. This is where practical compromise is necessary.
In a smaller home space, place the microphones at head height plus 30 to 40 centimetres and angle them down slightly toward the centre of the ensemble. Reduce the ensemble spread by having singers stand in a tighter arc rather than a flat line, which brings the outer voices into the pickup pattern more evenly. Keep the microphones away from walls: a minimum of 1.5 metres from the nearest reflective surface is advisable to prevent early reflections from colouring the pickup. If you are using an ORTF pair, the angled capsules will naturally reject some of the side wall reflections, which is one reason ORTF is often the most practical near-coincident technique for domestic ensemble sessions.
Monitoring and Communication During the Session
With multiple singers in the room it is not practical to use open-back monitoring speakers during recording because the playback bleeds into the microphones. Use closed-back headphones for your monitoring position. The Audio-Technica ATH-M50x gives a reasonably flat response for checking blend and timing, and the closed-back design means you can monitor at a useful level without any risk of bleed. For a larger session where you need to communicate with the ensemble between takes, a simple talkback microphone routed through your interface is essential. Most interfaces above a basic entry-level tier, including the Focusrite Clarett Plus range and the SSL 2+, include a dedicated talkback circuit that lets you communicate clearly without repositioning any of your recording microphones.
Between takes, play back short sections at a moderate level through a pair of studio monitors positioned away from the recording area so the ensemble can hear their own blend and intonation. The Yamaha HS5 or the Adam Audio T5V are compact near-field monitors that work well in this role without requiring a treated listening position. This playback step often improves subsequent takes dramatically because singers can hear and correct blend issues that are inaudible to them while they are performing.
Placing the microphones too close to the ensemble is the most frequent mistake in home choral recording. Close placement exaggerates the volume difference between front and back rows and captures too little acoustic blend, producing a recording that sounds like several individual vocalists rather than a unified ensemble. Move the microphones further back and raise them above head height to allow the voices to integrate in the air.
Recording in an untreated room and planning to fix the reflections in the mix is not a viable strategy. Convolution reverb and room correction tools cannot remove room reflections that have been captured in the recording signal because the reflections are time-aligned with the direct sound and cannot be cleanly separated. Treat the room before the session rather than relying on post-production to compensate.
Using a single microphone in omnidirectional mode for a vocal ensemble will almost always produce a disappointing result. An omni capsule captures the room equally from all directions and cannot provide stereo information, which means the ensemble sounds flat and the room ambience dominates. Use a matched stereo pair in a defined stereo configuration from the start of the session.
Conclusion
Recording a choir or vocal ensemble at home is achievable with two well-matched condenser or ribbon microphones, a clean interface with adequate gain, a thoughtfully treated room, and careful attention to the distance and height of the stereo pair relative to the ensemble. The gear is only as useful as the decisions made before the signal reaches it. Treat the room, position the group sensibly, set your gain conservatively, and the recording will reflect that preparation clearly.

FREE DOWNLOAD
Stop Guessing. Start Buying Smart.
The specs that actually matter, demystified.
Headphones, microphones, the spec sheet jargon you can ignore — all in one quick-reference PDF. Free, instant, no fluff.
Send Me the CheatsheetYou'll also receive occasional new guide notifications. Unsubscribe anytime. No spam, ever.