A reflection filter does not automatically fix a bad room. Used correctly, it removes early reflections from the rear of the microphone capsule and gives your vocal recordings far more usable clarity than bare walls ever will.
If you record vocals in an untreated room, you are fighting against early reflections that arrive at the microphone milliseconds after the direct signal. Those reflections smear transients, colour the frequency response of the recording, and make mixing considerably harder. A reflection filter addresses the most problematic source of those reflections: the space directly behind the microphone capsule where the rear rejection of a cardioid pattern is working hardest.
This guide covers the full process of setting up a reflection filter effectively. We will go through choosing the right stand setup, positioning the filter relative to the microphone, dialling in the distance between the vocalist and the capsule, and understanding what a reflection filter does not do so you can compensate elsewhere. Every step here comes from actual recording sessions in treated and untreated rooms, not from product marketing material.
Understanding What a Reflection Filter Actually Does
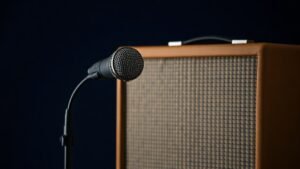
A reflection filter is an acoustic panel, usually curved, lined with foam or a combination of foam and a denser mass-loaded material, that mounts directly behind and around the rear of a condenser microphone. The most widely used design on the market is the sE Electronics Reflexion Filter Pro, which uses a multi-layer construction including steel, air gaps, and specialist acoustic foam. The Aston Halo is another well-regarded option that wraps further around the microphone and performs well at lower frequencies than simpler single-layer foam designs.
What the filter does is absorb and scatter sound waves that would otherwise bounce off the wall behind the microphone and re-enter the capsule from the rear. Because cardioid and supercardioid polar patterns reject sound at the rear by between 20 and 30 dB depending on frequency, even a modest amount of reflected energy from behind can influence the recorded signal at high frequencies where rear rejection is weaker. The filter shortens that reflection path and reduces its amplitude before it reaches the capsule.
What the filter does not do is treat the room itself. Sound still propagates outward from the vocalist in every direction. Reflections from the floor, the ceiling, and the side walls still arrive at the front of the capsule. A reflection filter handles one axis of a three-dimensional problem. That understanding should inform every placement decision you make.
Choosing the Right Stand and Mount for the Filter
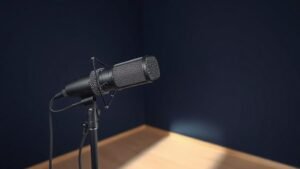
The single most common setup failure I see in home studios is mounting a heavy reflection filter on a cheap boom stand. The sE Electronics Reflexion Filter Pro weighs around 1.2 kilograms and the Aston Halo weighs closer to 1.4 kilograms. Add a microphone, a shockmount, and a cable, and you are putting well over 1.5 kilograms on the end of a boom arm. An inadequate stand will creep, tilt, or vibrate, and none of those things are recoverable in the mix.
Use a heavy-duty boom stand with a counterweight, or better still, mount the microphone and filter on a dedicated mic stand separate from any other equipment. The K&M 21090 is a reliable option that handles the weight distribution without counterbalancing gymnastics. If you are working in a smaller space and prefer a desk-mounted arm, the Rode PSA1+ is rated for heavier loads and is stiff enough to hold a shockmount and filter combination at the correct angle without drift. Tighten every joint fully before each session and check the position after fitting cables.
Positioning the Filter Relative to the Microphone Capsule
The reflection filter must sit behind the rear of the microphone capsule, not behind the body of the microphone. On most large-diaphragm condensers, the capsule is at the top of the body, and the rear null point of the cardioid pattern projects backward from that capsule position. If you mount the filter too low, it shields the wrong part of the microphone entirely and provides almost no useful acoustic benefit.
The standard mount on most reflection filters accepts a microphone stand thread and holds the microphone inside the filter by means of a central bracket. On the sE Reflexion Filter, the microphone fits into a rotating basket that lets you tilt the capsule angle while keeping the filter in position. Set the capsule so it sits roughly centred within the curved plane of the filter panels. The rear of the capsule should be no further than 8 to 10 centimetres from the filter surface. Closer is generally better as long as the filter is not touching the shockmount and transmitting vibration.
Orient the open face of the filter toward the vocalist and the closed rear face toward the most reflective surface in the room, which in most untreated spaces is a flat parallel wall. If you have a choice of which wall to face, point the filter toward the wall with the least glass, the fewest hard surfaces, and the most furniture or soft furnishing behind the vocalist. Those surfaces will absorb some of the sound the filter does not catch.
A reflection filter handles the rear axis of a three-dimensional acoustic problem, and knowing that limitation is what separates a good vocal recording from a merely acceptable one.
Setting the Vocalist Distance from the Capsule
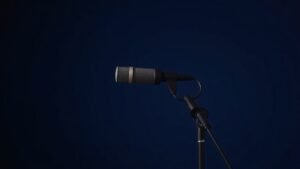
Distance from the capsule affects two things simultaneously: the proximity effect and the ratio of direct-to-reverberant sound. Move too close and low-frequency energy builds up on cardioid pattern microphones to an extent that requires heavy corrective equalisation later. Move too far and the room reflections from the front of the capsule begin to dominate, which is exactly what the reflection filter is designed to prevent from the rear.
For most large-diaphragm condenser microphones used on male or female vocals, a working distance of 20 to 35 centimetres from the capsule gives a healthy balance. At this range, the direct signal is strong relative to any early reflections, and the proximity effect is present but controllable. On a microphone like the Audio-Technica AT4040 or the Rode NT1, this distance produces a natural tonal balance that needs minimal low-frequency correction. On microphones with a more pronounced proximity response, such as the Shure SM7dB used in close-mic configurations, you may want to work at the outer edge of that range and use the built-in low-cut filter to compensate.
Ask the vocalist to maintain a consistent position throughout a take. Distance variation of even 5 or 10 centimetres between phrases changes both the tonal balance and the level in ways that are difficult to automate cleanly. A floor mark or a music stand placed at the correct distance gives an experienced vocalist a reliable reference point without requiring them to think about it during a performance.
Supplementing the Filter with Basic Room Treatment
A reflection filter working alone in a completely untreated room will improve the recording noticeably, but the improvement has a ceiling. Early reflections from the side walls and the floor still arrive at the front face of the capsule, and in a small square room those reflections can be nearly as loud as the direct signal at certain frequencies. The reflection filter addresses perhaps 30 to 40 percent of the total acoustic problem in a bad room.
The most cost-effective supplementary treatment is to place a thick duvet or moving blanket over any hard surface within 1.5 metres of the recording position. Behind the vocalist, a bookshelf filled with books of varying sizes provides excellent broadband scattering at no cost. If you have access to proper acoustic foam panels, positioning two or three 50mm panels on the side walls at ear height flanking the recording position reduces flutter echo and tightens the stereo image considerably on any stereo vocal overdubbing work.
For a more permanent setup, a portable vocal booth frame such as the sE Electronics Vocal Shield or a larger free-standing booth frame gives you a more controlled environment that works alongside rather than instead of a reflection filter. The filter handles the rear of the microphone; the additional panels address the front of the acoustic space. Used together in a small bedroom or home office, the combination produces results close enough to a professional treated booth to be commercially viable for most session and production work.
Gain Structure and Interface Settings After Setup
Once the filter and microphone are positioned correctly, the gain structure at the audio interface becomes the next critical variable. A well-placed large-diaphragm condenser in a reasonably controlled space requires less gain than most engineers expect when they first set up this configuration. The signal is clean and the noise floor of a good condenser is low enough that pushing the preamp gain too hard introduces preamp noise without improving the signal-to-noise ratio of the recording.
Set the preamp gain so that the vocalist at full performance volume peaks between -18 and -12 dBFS on the input meter. At 24-bit recording depth, that headroom gives you clean transients on loud consonants and plenty of resolution in the quieter passages. On an interface like the Universal Audio Volt 276 or the Focusrite Scarlett 4th generation, the preamp gain range is wide enough to accommodate both quiet and loud vocalists without running out of clean headroom. Phantom power should be engaged for any condenser, and it should always be engaged before connecting the cable and disengaged after disconnecting, to protect both the microphone and the interface input.
Positioning the filter behind the microphone body rather than the capsule defeats its purpose entirely. The acoustic null of a cardioid pattern projects from the capsule position, so the filter must shield the capsule rear specifically. Check the capsule position visually before every session when using an unfamiliar microphone model.
Using an underpowered or poorly balanced stand causes the setup to drift during a take. A heavy filter on a light stand tilts gradually under gravity, changing the polar pattern orientation relative to the vocalist mid-performance. Invest in a stand rated for the combined weight of the filter and microphone before anything else.
Relying on the reflection filter alone without addressing floor and side-wall reflections produces recordings that still sound like a small room. The filter works on one axis only. Even basic treatment behind the vocalist and on adjacent walls reduces the ambient character of the room enough to give the recording professional clarity that survives mixing without excessive processing.
Conclusion
Setting up a reflection filter correctly takes less than twenty minutes once you understand the acoustic logic behind it. Mount the filter on a stand rated for the weight, align it behind the capsule not the microphone body, position the vocalist at 20 to 35 centimetres, and supplement with basic surface treatment on the walls and floor within recording range. Those steps together produce vocal recordings that require considerably less corrective work at the mixing stage.

FREE DOWNLOAD
Stop Guessing. Start Buying Smart.
The specs that actually matter, demystified.
Headphones, microphones, the spec sheet jargon you can ignore — all in one quick-reference PDF. Free, instant, no fluff.
Send Me the CheatsheetYou'll also receive occasional new guide notifications. Unsubscribe anytime. No spam, ever.