An untreated bedroom does not just sound bad on its own terms — it actively works against you, adding reflections and low-frequency build-up that no plugin or equaliser can fully undo after the fact.
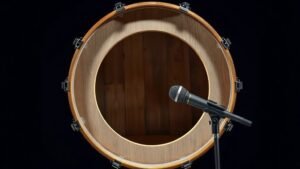
I have recorded in purpose-built studios and I have recorded in spare bedrooms, and I will tell you plainly: the room matters more than most people want to admit. A microphone like the Rode NT1 or the Audio-Technica AT2035 is capable of capturing genuinely professional results, but only if the acoustic environment is not feeding it a wall of early reflections, flutter echo, and muddy low-end resonance. The microphone does not lie, and neither does the room.
This guide walks through the full process of treating a bedroom for recording — from diagnosing what is actually wrong with your space, to placing bass traps, absorbers, and diffusers in the positions where they do the most work. I will cover the materials worth using, the ones that are overrated, and the common mistakes that set people back even after they have spent money on treatment panels.
Understanding What You Are Actually Fixing
Before you buy a single foam tile, you need to understand what acoustic problems a bedroom typically has, because the solutions are different for each one. The three main problems are flutter echo, early reflections, and modal resonance. Flutter echo is the repeating slap you hear when you clap sharply between two parallel hard walls. Early reflections are the first bounces off walls, ceiling, and floor that arrive at the microphone milliseconds after the direct sound, smearing transient detail and widening the apparent source. Modal resonance, often called room modes, is the low-frequency build-up that occurs when bass frequencies reinforce themselves between parallel surfaces — which is exactly what a rectangular bedroom provides.
Most people treat the first two problems and ignore the third, which is why so many bedroom recordings sound clean in the midrange but thick and undefined below 200 Hz. Bass traps are not optional extras — they are the foundation of a functional recording space. A room treated only with thin foam panels is a room where the high-frequency harshness has been removed but the low-end mud remains, which can actually make mixing decisions harder than in a completely untreated room.
Start With the Corners: Bass Traps First
The corners of a room are where bass energy accumulates most intensely, because pressure maxima from multiple room modes converge there. Filling the floor-to-ceiling corners with broadband absorptive material is the single most effective acoustic investment you can make in a bedroom studio. Thick rigid fibreglass or rockwool-based products work far better here than soft foam. Products like the GIK Acoustics 244 Bass Trap or the Acoustimac DMD Fabric panels offer the kind of density and depth — typically 100mm or more — that actually attenuates frequencies below 300 Hz meaningfully.
You do not need to fill every corner immediately, but prioritise the four vertical corners first, running floor to ceiling if possible. The two front corners — the wall behind your monitoring position or recording position — are most critical. Many engineers also treat the upper wall-ceiling corners, which form the trihedral corners of the room and are the most powerful bass trap locations of all. If budget is tight, a single pair of floor-to-ceiling broadband panels in the two front vertical corners will do more audible good than covering every wall surface with thin foam.
Rockwool RW3 or Knauf Earthwool 50mm and 100mm slabs, cut to size and wrapped in acoustically transparent fabric, are a cost-effective DIY route that performs on par with commercial panel products at a fraction of the cost. I have built panels this way for multiple home studios and the results measure well and sound clean.
Treating First Reflection Points
Once the corners are addressed, the next priority is the first reflection points — the specific locations on the walls, ceiling, and floor where sound from a speaker or microphone bounces directly toward the listening or recording position. For a recording setup centred around a desk with monitors, these points are typically found on the side walls at ear height, the ceiling midway between the desk and the front wall, and the wall directly behind the listening position.
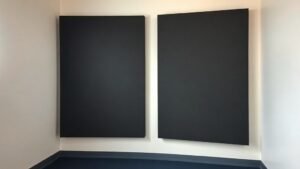
Locating these points is straightforward. Sit at your usual position and have someone hold a mirror flat against the side wall while sliding it forward and back. The point where you can see the face of your nearest monitor in the mirror is the first reflection point on that wall. Place a broadband absorptive panel there — something at least 50mm thick. GIK Acoustics and Vicoustic both make purpose-built wall panels sized appropriately for this task. The Vicoustic Flexi A50 is a well-regarded option that performs well across the critical midrange and upper-bass range without costing as much as fully bespoke installation panels.
For a recording microphone position rather than a monitoring position, the logic is similar. If you are recording a vocalist standing in the room, the first reflection points are the walls immediately to their left and right, the ceiling above them, and the wall directly behind the microphone. A simple gobo — a freestanding acoustic screen like the sE Electronics RF-X Reflexion Filter or a heavier studio-style gobo — can control the reflections immediately around the microphone even before permanent wall treatment is in place.
Bass traps are not optional extras — they are the foundation of a functional recording space, and no amount of foam tiling compensates for ignoring them.
Adding Diffusion Without Overdamping the Room
There is a real risk of making a bedroom too dead — a common outcome when people cover every available surface with absorptive material. A heavily overdamped room sounds unnatural and fatiguing to record in, and it can make dry vocals sound lifeless even before any reverb is applied in the mix. The goal is a controlled room, not an anechoic chamber. Diffusion scatters rather than absorbs sound energy, maintaining a sense of liveness and space while eliminating the harsh coherent reflections that cause problems.
Diffusion works best on the rear wall of a room, behind the listening position, and on the ceiling above the mix position. Quadratic residue diffusers — the mathematical arrangement of wells of varying depths you see on the back walls of commercial studios — are the most effective type. They are expensive to buy ready-made, but the design formulas are in the public domain and DIY builds from MDF are entirely viable. Products like the GIK Acoustics Scatter Plate or the Acoustics First ArtDiffusor offer commercial alternatives that are compact enough for domestic rooms.
A practical rule of thumb I use when setting up a bedroom studio is to aim for roughly 25 to 35 percent of the total wall surface area being diffusive rather than absorptive, starting from the rear of the room and working forward. This keeps the room balanced — controlled enough for accurate monitoring and clean recording, but live enough that it does not induce that claustrophobic flatness that over-treated rooms have.
Decoupling Gear and Controlling Floor Transmission
Acoustic treatment panels on walls and ceilings address airborne sound, but a bedroom also transmits structure-borne vibration — through the floor, through the desk, and through whatever your monitors are sitting on. If your studio monitors are resting directly on a wooden desk, the desk becomes a resonator and the bass response of your monitoring chain is coloured before it even reaches your ears. This matters both for accurate mixing and for recording, because a subwoofer-like desk resonance can cause low-frequency feedback or colouration when microphones are in the same room as active monitors.
Monitor isolation pads are a direct and inexpensive solution. The IsoAcoustics ISO-L8R stands or the Primacoustic Recoil Stabilizer are both well-tested options that decouple the monitor cabinet from the desk surface, reducing the transmission of bass energy into the desk and improving the precision of stereo imaging. For heavier monitors, the IsoAcoustics GAIA series floor spikes serve the same purpose for floor-standing or stand-mounted speakers.
If you are recording instruments with a microphone stand on a wooden floor, placing a small mass-loaded mat or a section of dense carpet under the stand base reduces the pick-up of floor vibration through the stand — particularly useful when recording acoustic guitar, where even foot movement can register on a sensitive large-diaphragm condenser.
Controlling the Space Behind the Microphone
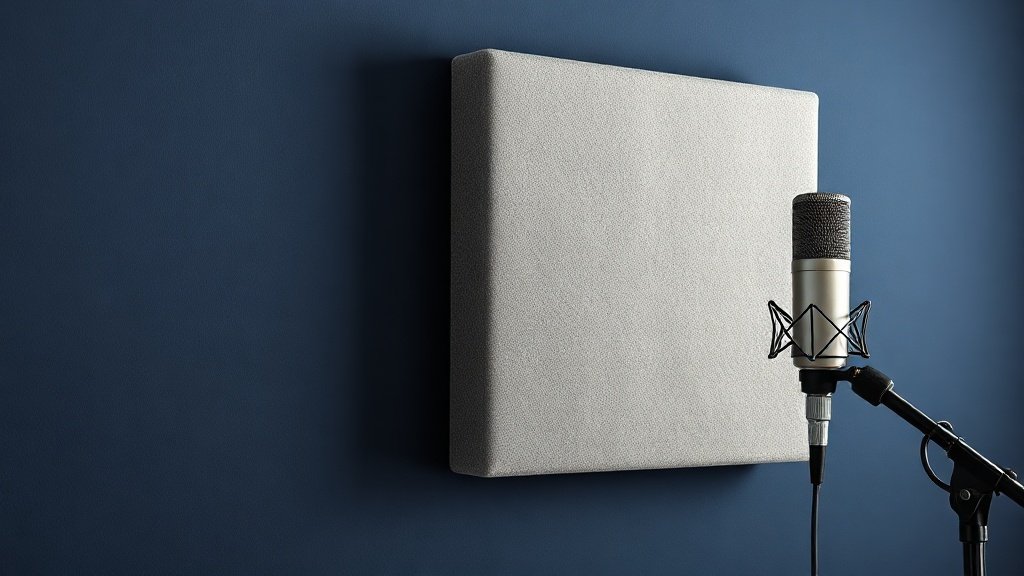
The area directly behind a microphone — meaning the null axis on a cardioid pattern or the rear lobe of a figure-of-eight — is often overlooked in bedroom treatment plans, but it has a direct effect on recorded tone. With a cardioid microphone, rejection from the rear is good but not perfect, typically around 15 to 20 dB at 180 degrees, and reflections from a hard wall behind the mic still contribute to the room sound captured in the recording. A absorptive panel on the wall behind the microphone reduces this contribution and tightens up the recorded source.
For vocalists, I typically place a 100mm broadband panel on the wall directly behind the microphone at head height, and another on the wall behind the vocalist to control the room tail that the microphone picks up from the front of the capsule. This two-sided approach — absorption behind the mic, absorption or diffusion behind the singer — gives a controlled but not lifeless result that sits well in a mix without heavy processing. If the wall behind the vocalist is hard and reflective, the microphone hears the room as much as it hears the performer, which is almost always a problem to avoid in a small bedroom environment.
Covering every wall with thin foam tiles is the most widespread and least effective approach to bedroom treatment. Foam tiles under 50mm thick have almost no effect below 500 Hz, which means they reduce high-frequency brightness while leaving the bass and lower midrange problems entirely intact — often making the room sound worse for mixing decisions, not better.
Treating the room only for monitoring without considering the recording position leads to inconsistent results. The acoustic character at the microphone position can be entirely different from the character at the mix position, so both need to be assessed and treated independently rather than assuming one set of panels solves both problems simultaneously.
Trying to soundproof a room with acoustic treatment panels is a fundamental misunderstanding of how both systems work. Acoustic treatment controls the sound behaviour inside a room — reflections, decay, and resonance — while soundproofing controls sound transmission through walls, floors, and ceilings. These require completely different approaches, and no quantity of foam or rockwool panels will stop sound from leaving or entering the room through the structure.
Conclusion
Treating a bedroom for recording is a process of working through the problems in order of impact: bass trap the corners first, address the first reflection points second, introduce selective diffusion third, and then refine the microphone and monitoring positions with decoupling and targeted absorptive panels. A methodical approach done with modest materials consistently outperforms an expensive but poorly planned treatment installation — and the result is recordings that translate accurately to other listening environments from the moment you press record.

FREE DOWNLOAD
Stop Guessing. Start Buying Smart.
The specs that actually matter, demystified.
Headphones, microphones, the spec sheet jargon you can ignore — all in one quick-reference PDF. Free, instant, no fluff.
Send Me the CheatsheetYou'll also receive occasional new guide notifications. Unsubscribe anytime. No spam, ever.