The difference between a recorded guitar tone that cuts through a mix and one that sounds like it was captured inside a cardboard box is almost never the amp itself — it is where you put the microphone and which one you reach for first.
Recording electric guitar amplifiers is one of the oldest disciplines in studio engineering, and it remains one of the most misunderstood. A guitarist can spend years dialling in a live tone, but the moment a microphone enters the equation, all of that careful work gets filtered through a chain of acoustic and electronic decisions that the player often has no visibility into. The mic you choose, where you place it, and how far it sits from the speaker cone will define the recorded character of that guitar part more than almost any EQ move you make afterwards.
This guide covers the core microphone types used for amp recording — dynamic, condenser, and ribbon — along with the practical placement variables that change what you capture. We will look at single-mic approaches that work in untreated rooms, how to combine two microphones without creating phase problems, and the less obvious choices around polar patterns and distance that experienced engineers use to manage room sound. The goal is a recorded guitar track that serves the song rather than one that simply documents what the amp was doing in the room.
Choosing the Right Microphone Type for the Job
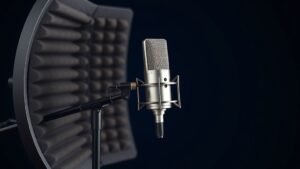
The Shure SM57 is the starting point for almost every conversation about guitar amp recording, and that reputation is entirely earned. It is a cardioid dynamic microphone with a frequency response that rolls off the low end gently and has a presence peak around 5 to 10 kHz that adds definition to midrange-heavy sources like guitar speakers. It is rugged, it handles extremely high sound pressure levels without distorting, and it has been used on guitar recordings across virtually every genre since the 1960s. If you own one, you already have the foundation of a workable amp-recording rig.
That said, the SM57 is not the only answer. The Sennheiser e 906 is a flat, supercardioid dynamic that many engineers prefer for capturing a fuller low-midrange picture, and its side-address design lets you hang it directly over the speaker grille without a stand arm getting in the way. For heavier, darker tones, the Audix i5 offers a slightly different colour that can sound more compressed and focused than the SM57. Dynamic microphones are the standard choice for close-miking guitar speakers because they tolerate the sustained high SPL of an amp playing at studio volume without any risk of damage or clipping at the capsule.
Ribbon microphones bring a different character entirely. A figure-of-eight ribbon like the Royer R-121 captures both the front of the speaker and a controlled amount of the room behind it, and the natural high-frequency roll-off of most ribbon designs softens the harshness that can appear in bright or fizzy amp tones. Engineers often pair a ribbon with a dynamic — the SM57 on axis for presence and attack, the R-121 positioned slightly further back for body and air — and blend the two signals at the mix stage. The Beyerdynamic M 160 is a hypercardioid ribbon that is smaller and more directional than the R-121, which makes it useful in poorly treated rooms where you want ribbon character without as much rear pickup.
Mic Placement: On-Axis, Off-Axis, and Edge Positioning
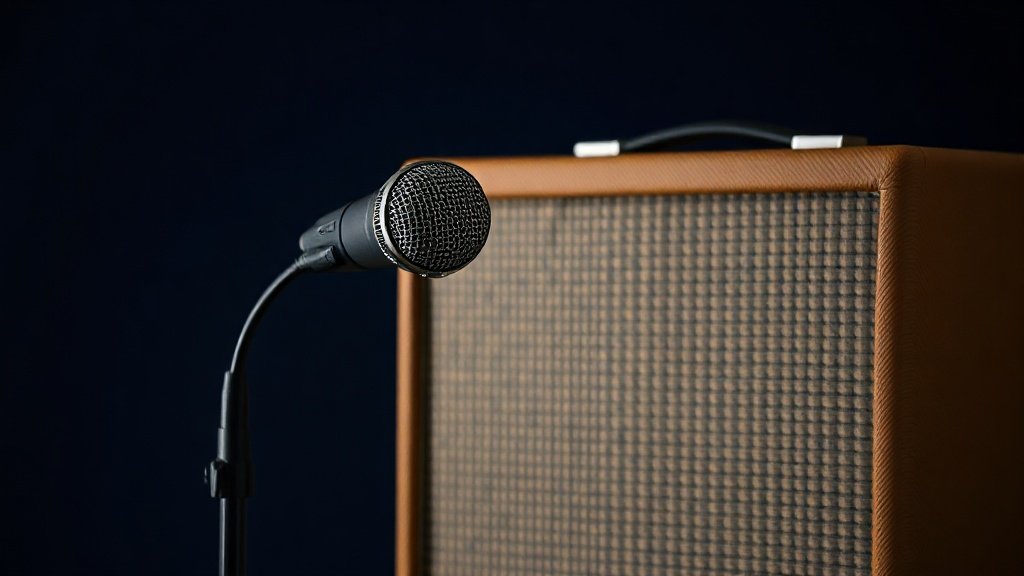
Where you point the microphone relative to the speaker cone changes the tonal character of the recording in ways that no equaliser can fully replicate after the fact. The centre of the speaker cone — directly on axis — produces the brightest, most focused capture with the sharpest transient detail. This is where you get the attack and presence that makes a guitar sit forward in a dense mix. However, dead centre can also emphasise harshness and sibilance in amp tones that are already bright, particularly with high-gain settings.
Moving the microphone towards the edge of the cone progressively reduces high-frequency content and introduces more of the lower midrange warmth that comes from the speaker surround. An SM57 positioned roughly halfway between the dust cap and the outer edge of the cone is a common reference position for many engineers working in commercial studios, because it balances articulation with body. Angling the capsule so it points slightly away from the centre of the cone — what engineers call off-axis placement — further softens the top end and adds a slight room characteristic even in close-miking situations.
Distance from the grille cloth matters as much as lateral positioning. At less than 2.5 centimetres from the grille, you are capturing primarily the direct output of the speaker with very little room contribution. This is the cleanest and most controllable position, and it is where proximity effect becomes relevant for directional microphones — the low-frequency boost that occurs as a cardioid or supercardioid microphone gets very close to a source. Used deliberately, proximity effect can add weight to a thin-sounding amp. Used accidentally, it turns a perfectly balanced tone into something muddy and undefined. Pulling the mic back to 15 to 30 centimetres starts to blend room reflections into the signal, which can add depth or introduce problems depending entirely on the acoustic quality of the space you are working in.
The centre of the speaker cone is not always the right target — moving the capsule toward the edge changes the tonal character in ways that no equaliser will fully correct later.
Using Two Microphones Together Without Phase Problems
Combining two microphones on a single guitar speaker is one of the most effective ways to build a recorded tone with more depth and flexibility than a single mic can achieve. The classic pairing of an SM57 close on axis with a Royer R-121 positioned slightly further back and angled toward the edge of the cone gives you two distinct captures that complement each other in frequency content and transient character. When you blend them in the DAW, you have real-time control over the brightness and body balance of the recorded tone without touching an equaliser.
The risk with any two-microphone setup is phase cancellation. When two microphones capture the same source from different distances, the sound wave arrives at each capsule at a slightly different time. If those two signals are out of phase by a significant enough amount, combining them at unity gain will thin out the low end, reduce overall level, and in the worst cases create a hollow, phasey quality that is very difficult to correct in the mix. The practical solution is to use the three-to-one rule as a starting point: position the second microphone at least three times the distance from the first microphone as the first microphone is from the source. If the SM57 is 5 centimetres from the grille, the second mic should be at least 15 centimetres away.
Even with careful positioning, always check phase relationship in your DAW before committing to a recording. Zoom into the waveforms of the two tracks and look at whether the peaks are aligned or inverted. Most audio interfaces and DAW plug-ins include a phase invert switch — flip it on the ribbon or the condenser track and listen to whether the combined signal sounds fuller or thinner. The fuller version is the correct polarity. This takes 30 seconds and prevents a problem that is genuinely difficult to diagnose once other instruments are added to the session.
Managing Room Sound in an Untreated Space
Most home studios and project rooms are not acoustically treated to the standard of a commercial recording facility, and recording electric guitar amps in those environments requires some practical strategies to avoid capturing unflattering room reflections alongside the direct amp sound. The single most effective approach is to get the microphone as close to the grille as the SPL allows — typically 2.5 to 7.5 centimetres — because at that distance the direct signal overwhelms any room contribution. The ratio of direct to reflected sound drops sharply as you increase distance, so close-miking is the primary defence against a problematic room.
Placing the amp in a corner or against a wall changes the low-frequency response of the room around it, which can add or subtract weight from the recorded tone in ways that are hard to predict without listening carefully. Many engineers prefer to pull the amp away from walls and into the room slightly, then work with close microphone placement to control the capture. If you have access to portable acoustic panels — the kind made from rockwool or mineral wool inside a simple timber frame — placing two or three behind and around the amp creates a makeshift dead zone that reduces early reflections significantly without requiring permanent room treatment.
For rooms that are genuinely problematic, the load box and impulse response approach offers an alternative. A device like the Universal Audio OX Amp Top Box or the Two Notes Torpedo Captor allows you to run the amp at full power into a reactive load without producing any acoustic output, then capture a direct signal that can be processed with impulse response convolution to simulate the sound of a miked speaker cabinet. This is not the same as placing a real microphone in front of a real speaker, but in rooms where acoustic capture is simply not viable, it produces results that are far more controllable and repeatable.
Condenser Microphones at a Distance
Large-diaphragm condensers are rarely the first choice for close-miking electric guitar speakers — the SPL handling of most studio condensers is sufficient, but the extended high-frequency sensitivity that makes them excellent for acoustic instruments and vocals tends to emphasise the fizz and harshness in distorted amp tones. However, a large-diaphragm condenser positioned further from the amp — 60 centimetres to a metre away — can capture the sound of the amp in the room in a way that blends usefully with a close dynamic microphone on the grille.
The Neumann U 87 Ai is a common choice for this room microphone role when budget allows, because its cardioid pattern and smooth high-frequency response capture the ambient character of the recording space without excessive brightness. The AKG C414 XLII is another widely used option, and its multiple polar pattern settings — cardioid, figure-of-eight, omnidirectional — give you real-time control over how much room information the mic collects. Using the omnidirectional pattern on a room mic captures the full acoustic environment of the space, while the cardioid pattern focuses more on the direct amp sound at that distance.
Placing the microphone dead centre on the dust cap is not automatically the correct starting position. The centre of the cone produces the brightest and most aggressive capture, which compounds harshness in already bright or high-gain tones — start halfway between the dust cap and the surround, then move and listen.
Recording two microphones at the same distance from the speaker does not guarantee phase coherence. Even small differences in capsule position create timing offsets that cause cancellation when the signals are summed — always check phase relationship in the DAW and use a polarity invert switch to confirm which alignment sounds fuller.
Pulling the microphone further from the amp to capture more room sound in an untreated space makes the problem worse, not better. Increased distance raises the ratio of reflected to direct sound, making room problems more audible — close-miking is the most reliable way to minimise the impact of a problematic acoustic environment.
Conclusion
Recording electric guitar amplifiers well comes down to a small number of decisions made carefully rather than a large number of options explored randomly. Choose a microphone matched to the tonal character you are after — a dynamic for presence and SPL tolerance, a ribbon for body and softness, a condenser for room capture at distance. Place it deliberately relative to the speaker cone, check phase when using multiple microphones, and manage the room contribution through distance and positioning rather than hoping to correct it later. Get those fundamentals right and the mix becomes significantly easier.

FREE DOWNLOAD
Stop Guessing. Start Buying Smart.
The specs that actually matter, demystified.
Headphones, microphones, the spec sheet jargon you can ignore — all in one quick-reference PDF. Free, instant, no fluff.
Send Me the CheatsheetYou'll also receive occasional new guide notifications. Unsubscribe anytime. No spam, ever.